Build Perfect Guitar Pedal Order In 9 Steps (With Diagrams)
We work with various affiliate programs. If you purchase via our links we may earn a small commission at no extra cost to you.
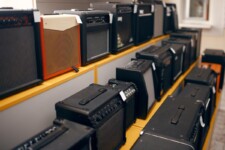
Effects pedals are a dynamic and exciting way to create new tones from your electric guitar or bass, and things start to get interesting when you chain multiple pedals together into an effects loop.
As your pedal collection grows, things can get complicated when working out the perfect guitar pedal order for building your effects signal chain. While experimentation can lead to some unique tones, there are a few rules you can follow to make sure you’re getting the best sound out of your rig.
Becoming a pro with your guitar pedal order can take some research, but I’m going to give you the full run down and help you master properly setting up your signal chain!
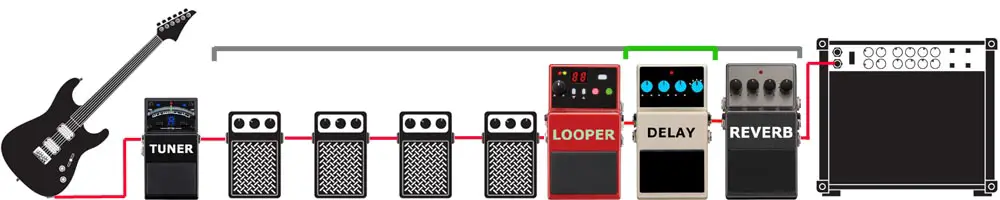
I’m going to step you through each pedal type in an easy to understand way, and then look at how they fit in your signal chain. Rather than copying a standard guitar pedal order diagram I’ll show you how to create your own guitar pedal chains.
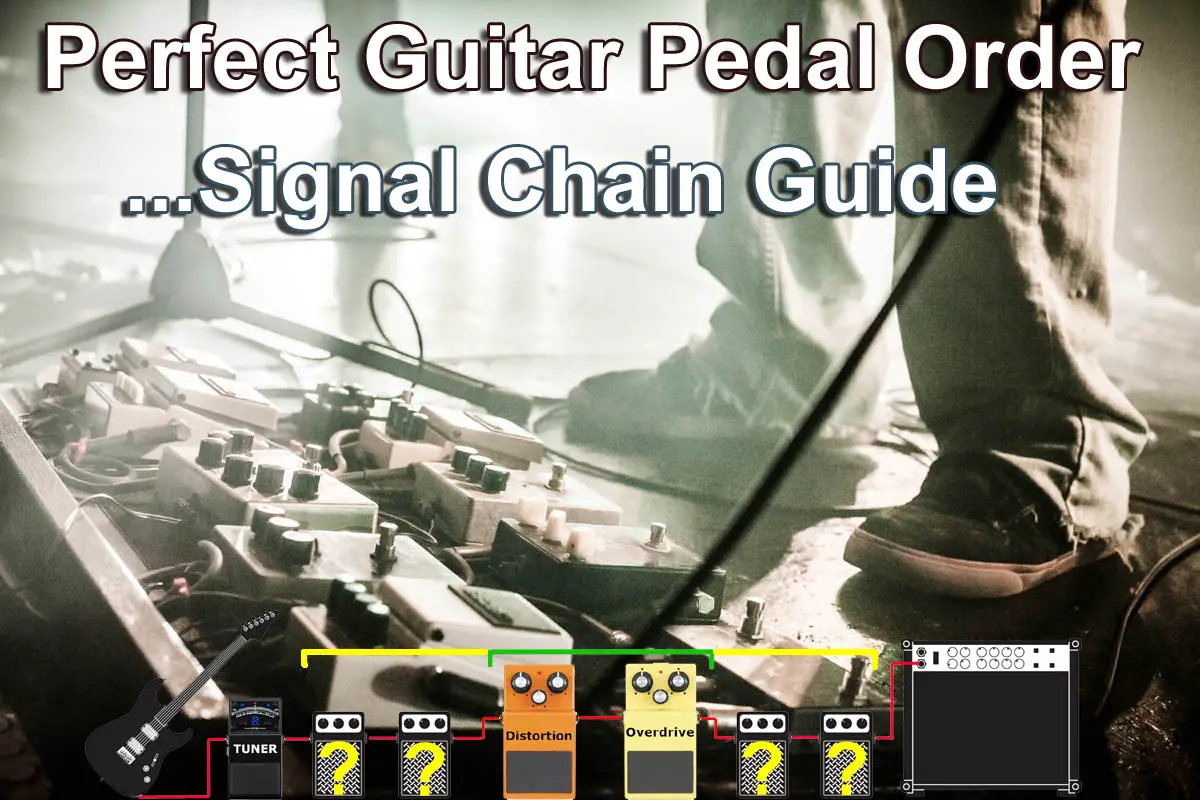
From the start of the chain to the end, learning how your pedals interact will help you easily work out your own guitar pedal order to find your own individual sound.
Click here to go straight to the guitar pedal order diagrams
The Basics of Guitar Effects Signal Chain Order
If you’ve already got a handle on what each type of pedal is and what it can do then you’re already halfway there to becoming a master of your signal chain. If not then I’ll get you up to speed shortly!
The start and end of a pedal signal chain refer to the pedal immediately after your guitar and the last pedal before the amp respectively.
To maximize your tone and prevent certain pedals from dominating the chain there is a straightforward order that your pedals should go in your signal chain from start to end.
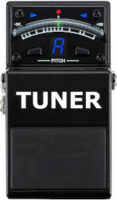
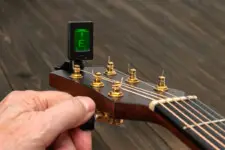
1. Tuning Pedals
Should always start the chain, any effects before you tuner will just interfere with the accuracy of your tuner.
2. Impedance Sensitive Pedals
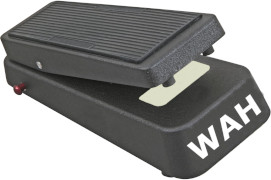
(such as wah pedals and fuzz boxes). These types of pedals interact with how hard or soft you play your guitar and the effect that has on their tone is only reduced if placed later in the chain.
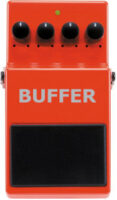
3. Buffer Pedals
Should come after any impedance sensitive effects and are used to preserve signal strength throughout the signal chain
4. Dynamic Effects Pedals
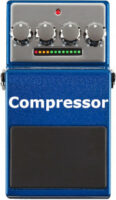
(such as compression, pitch shifters, and octave pedals). These pedals help push a consistent amount of volume through the rest of your chain and level out any volume gains and drops caused by the pedals before them. They’re also responsible for changing pitch and can sound muddy if placed too late in the chain
5. Gain Pedals
(such as distortions and overdrives). These appear towards the back half of the chain. These pedals drive and chop up your signal making them sound louder and more aggressive. Place them too early and you won’t hear the rest of your effects
6. Modifier Pedals
(such as phasers, flangers, and chorus pedals). Effects change the tone through filtering and accenting.
7. Looper Pedals
Should come before anything that adds trailing effects to avoid awkward out of time loops.
8. Delay Pedals
Go right near the end so that they can affect the entire sound of your signal chain and add repeats to your total sound.
9. Reverb Pedals
Come last they add a blanket to your whole tone and add an overall ambiance to your sound.
Finding new tones is all about trying new things even if it is a bit unconventional.
So by no means is this the definitive order and just like guitar technique; sometimes breaking the rules can uncover sounds you didn’t know your guitar could make!
In the next section I’ll break down in-depth what each type of pedal does and how you should fit them in your signal chain.
While it’s easy to follow a basic signal chain order list, you’re going to get more out of your signal chain if you understand why the pedals go in this order.
How To Build Your Own Perfect Guitar Pedal Order (With Diagrams)
Getting to know your pedals takes time.
While demos on YouTube can make it look easy to get the perfect tone straight out the box; you need to have patience to learn how each dial and setting changes the way your guitar sounds – especially if you plan to use multiple pedals at once.
There’s no use having a huge pedalboard setup if you don’t understand what each one does. That’s why I recommend building your pedalboard slowly. Pick the effects you think you’ll use the most first, and master them before moving on to your next purchase!
To help you decide which pedals will help you achieve the guitar tones you’re chasing, let’s run through the different kinds of pedals seen in the signal chains of your favorite bands.
1. Tuning Pedals
Starting us off is the most straightforward pedal on the list: a tuner!
While it’s not the most exciting purchase it’s an essential one, especially if you plan on playing live or jamming with other musicians anytime soon.
While using a tuning app on you’re phone will be more than fine for playing in your bedroom it just won’t cut it in a live setting.
Chromatic tuning pedals listen to your guitar directly from the lead meaning it won’t get interfered with by other musicians playing or the sound of the crowd. This means it’s about as accurate as you can get when it comes to tuning your guitar.
Where to put Tuning Pedals

This pedal ALWAYS GOES FIRST in your chain to give it the clearest sound from your guitar.
2. Impedance Sensitive Pedals
Unlike other pedals that add an overall effect to your tone that remains relatively unchanged by the way you play. These pedals are highly reactive and can sound completely different based on your play style.
Where to put Impedance Sensitive Pedals
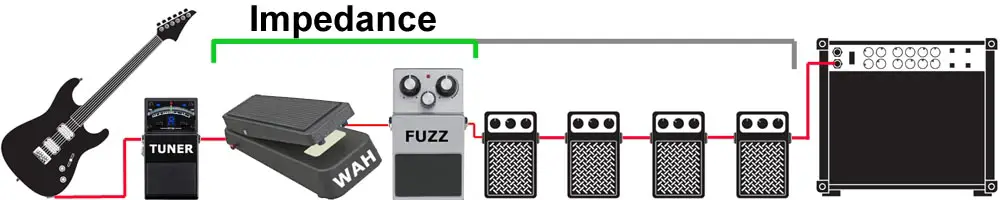
Impedance sensitive pedals are most sensitive to the way you play your guitar and for that reason need to be placed at the start of your signal chain.
Impedance – Wah Pedals
Chances are you can already hear the sound of a wah pedal just from its name alone.
Made famous for adding much of the dynamics to the psychedelic guitar solos of artists such as Jimi Hendrix. The Wah pedal has a very iconic sound.
Being one of the earliest guitar pedals to be invented has meant its seen some interesting uses since its inception.
While some players will use it for its classic wavey effect it can also be used to cut frequencies, isolating the highs or lows of your tone when leaving it in the up or down position.
The technique of cutting frequencies was popularised by heavy metal bands in the 80s. Leaving their Wah pedal all the way up cut out the deeper sounds of their guitars. This gave their solos their piercing and massive tone!
Due to its focus on changing the frequency of your tone a Wah pedal should be placed at the start of your signal chain for the effect to have a noticeable impact on your tone.
Impedance – Fuzz Pedals
While you might think fuzz pedals should sit alongside their noisy companions the distortion and overdrive pedals, they actually need to come right near the front of your signal chain and before any buffers, if you’re using one.
The reason Fuzz pedals need to be put early in your chain is that they are reactive to the way you play. Unlike distortion and overdrive that increase the gain of your signal, fuzz pedals do things a bit differently. They take what you play and add those warm fuzzy tones without adding any gain.
So while they are the most chaotic of the “distortion” style pedals they’re quite sensitive (so be kind to them by putting them first).
By placing your fuzz pedal up the front of your chain you can make use of its dynamics. Playing gently into the pedal will give you a breezy fuzz sound. On the other hand, slamming your guitar will get your tone sounding aggressive and menacing.
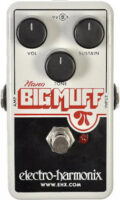
The most popular fuzz pedal is the Electro-Harmonix Big Muff. It’s been around since the 60s’ and has been adapted and reissued ever since.
To help you decide if a fuzz pedal is what your signal chain needs next here’s a demo:
3. Buffer Pedals
The job of a buffer pedal is to maintain signal strength throughout your signal chain. Sometimes guitarists use two of them in their chain; one at the start and one at the end. Doing this will give you the most consistent sound and prevent any tone drain caused by chaining pedals.
They’re not essential especially if you’re just starting to dip your toes into the world of guitar effects but they’re something to consider if you’re starting to pick up professional gigs.
Buffers work by tricking your guitar into thinking it’s plugged directly into an amp giving you the maximum amount of drive from your guitar pick-ups. Without one the signal from your guitar can become weak as it passes through the number of pedals you have.
This can cause something called tone drain. Tone drain will make your guitar sound weak and muddy. There’s no point buying a bunch of amazing pedals if by the end of the chain the signal doesn’t have to power to push a great tone to your amp.
Where to put Buffer Pedals
If you’re just going to use one buffer in your chain you have to choose either the start or end of your chain to put it. If you’ve got a lot of pedals in your chain then you’ll get the best result from it by placing it at the start of your chain.
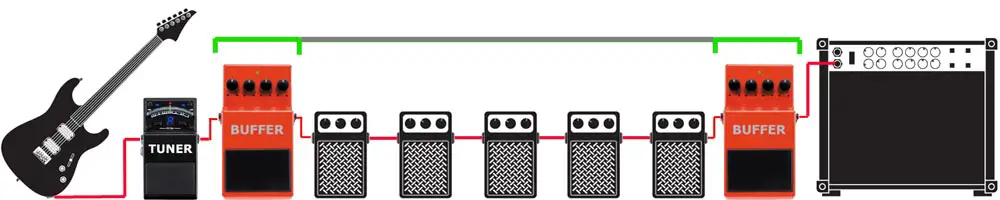
The buffer should be placed at the end if you’re using a long cable to connect the end of your chain to your amp.
If it’s going at the start of your chain the only pedals that should go before a buffer pedal are the previously mentioned impedance sensitive pedals mentioned earlier such as wah and fuzz.
4. Dynamic Effects Pedals
Dynamic effects act upon the way your signal is received from your guitar. They’re capable of bending your tone in a way that sounds impossible to achieve on a standard guitar or to lock your guitar into a steady dynamic range.
The most common types of dynamic effects are pitch shifters, octave pedals, and compressors.
Where to put Dynamic Effects
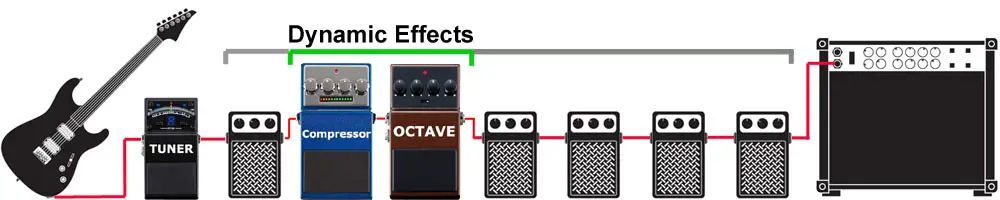
Dynamic effects should be near the start of your effects chain, with only tuners and impedance sensitive effects before them.
Dynamic Effects – Pitch Shifters
If you’ve ever felt limited by the way you can tune a guitar then get yourself a pitch shifter! These pedals take what you play and pitch it up or down to some insane keys unachievable through tuning your guitar.
While they can be used subtly they are mostly used to create otherworld guitar tones that sound nothing like the original instrument. Because they track and repitch your instrument on the fly they often have a gritty retro tone that some might think sounds broken.

An iconic use of a pitch shifter can be heard in the opening moments of My Iron Lung by Radiohead. The uneasy bending of the guitar’s tone suits the track perfectly and adds a level of dynamics not possible with any other pedal.
Some popular pitch-shifting pedals include the Digitech Whammy and the BOSS PS series (the latest being the PS-6). To give you an idea of what to expect from a pitch shifter here’s a demo of the Boss PS-2 in action!
Dynamic Effects – Octave Pedals
Octave pedals are similar to pitch shifters but are a little less… whacky. They take your guitar’s sound and pitch it up or down as well but unlike a pitch shifter that gives you total control of the pitch; an octave pedal pitches your guitar in exact octaves.
If you’re unfamiliar with music theory, octaves are different frequencies of the same note. The best way to understand this is to play a note on your guitar, then on the same string move that note 12 frets up. What you’ll get is the same note an octave higher.
These work great if you want to change the pitch of a chord progression or lead section without changing the key.
Dynamic Effects – Compressors
Compressors take your tone and squeeze it tight!
We all know the frustration of trying to get a balanced sound out of our guitar especially when soloing. A compressor helps alleviate this pain by keeping your tone at a consistent volume level.
By using a compressor you push out an even tone to the rest of your pedalboard that helps the rest of the chain remain steady.
Again it’s not the most exciting pedal, especially if you’re just getting started but if you’re a tone perfectionist you have to have one!
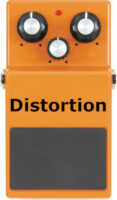
5. Gain pedals
Gain pedals are likely responsible for getting you into guitar in the first place. This family of pedals is the most important for creating the gritty tones heard throughout every genre of rock music; from blues to grunge!
There are two main types of gain pedals; distortion and overdrive. While both will achieve a level of dirt to make your signal chain ready to rock, they do have their differences so pick wisely depending on how wild you want your tone to get.
Where to put Gain Pedals
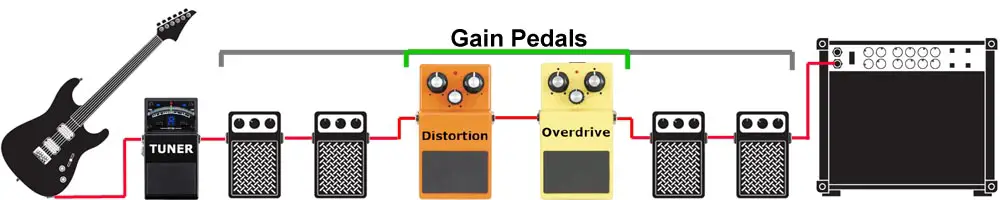
Gain pedals should appear around the middle of your signal chain as they ramp up your tone to be fed to the rest of the chain. They should ‘never’ be placed before any dynamic or impedance sensitive pedals because of the way they cut up your signal in a way that can mess with how those pedals work.
Unless of course, you’re chasing a completely off-the-wall tone…
Gain – Overdrive Pedals
Before the invention of the overdrive pedal in the early 70s’ blues musicians pioneered a technique of the same name that would inspire guitar companies to emulate it inside a box.
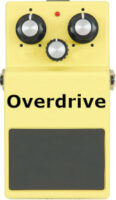
The basic idea of overdrive is to provide so much power to an amp that it begins to distort or ‘clip’. This resulted in a warm and visceral tone that punched through the rest of the band. This concept lives on with the overdrive pedal.
Overdrive pedals boost your guitar’s signal inside the pedal creating the same effect without the need to overdrive the amp itself. They sound crunchy and raw while maintaining clarity in the intonation of what you’re playing. This makes them perfect for softer styles of rock and blues.
Gain – Distortion Pedals
Distortion is the most popular guitar effect ever invented. I could list spend the rest of this article listing bands defined by the sounds distortion pedals produce but if you’re into guitar you already know the deal.
Unlike its counterpart (the overdrive pedal) distortion is designed to make your guitar sound particularly angry. It not only boosts your tone but produces its own smiley layer of grit on top of the overdriven signal.
These pedals were first produced in the late 70s out of a need for more aggressive guitar sounds as harder styles of rock started to become mainstays in the charts. No longer did bands need to crank their amps to unbearable levels to create tones straight out of hell.
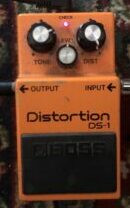
The most important distortion ever made released in 1978 and can still be purchased today. The Boss DS-1 is responsible for a lot of the tones used by bands from Alice Cooper to Nirvana. It’s super adaptable to different genres that need a bit of extra kick and that’s why it’s our recommendation for a distortion pedal.
But I’ll let it speak for itself, hear a snippet of it in action below.
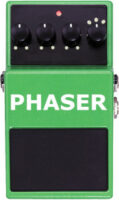
6. Modifier Pedals
If you want to add some psychedelic flair to your signal chain then modifier pedals are where it’s at! The pedals run your tone through different kinds of filters to create spaced-out sounds and add a bunch of unique color.
Where to put Modifier Pedals
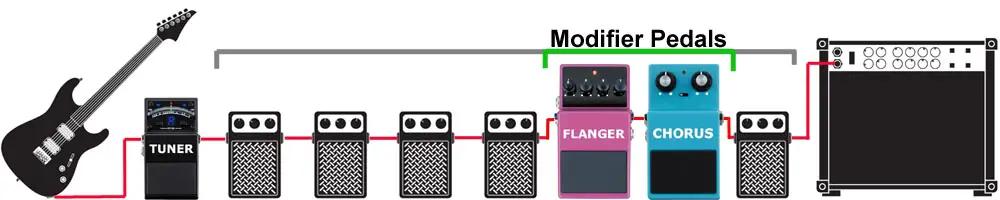
Modifier pedals are more or less at the end of your signal chain, only succeeded by pedals that add repeats or ambiance to your sound. Due to the way they filter your tone they sound best when placed after anything that changes the dynamics or gain of your guitar.
You want to avoid rocking a distortion after a modifier, because it will likely cancel out the effect of the modifier pedal and make the distortion sound muddy and unfocused!
Modifiers – Chorus Pedals
Chorus pedals give your guitar an orchestral kind of sound by layering your tone on top of itself.
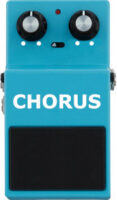
This doubling, or sometimes quadrupling effect, creates a bright and playful shimmer to your guitar tone that is distinct and adds a lot of character to your performance.
When placed after a distortion pedal it beefs up your tone helping to create fat sludgy riffs common in genres like grunge.
Modifiers – Phaser Pedals
Phasers are capable of sending your guitar up to the moon and back! By modulating a high pass filter over your tone. It creates a sweeping effect that is synonymous with the acid rock of the 60s and 70s’.
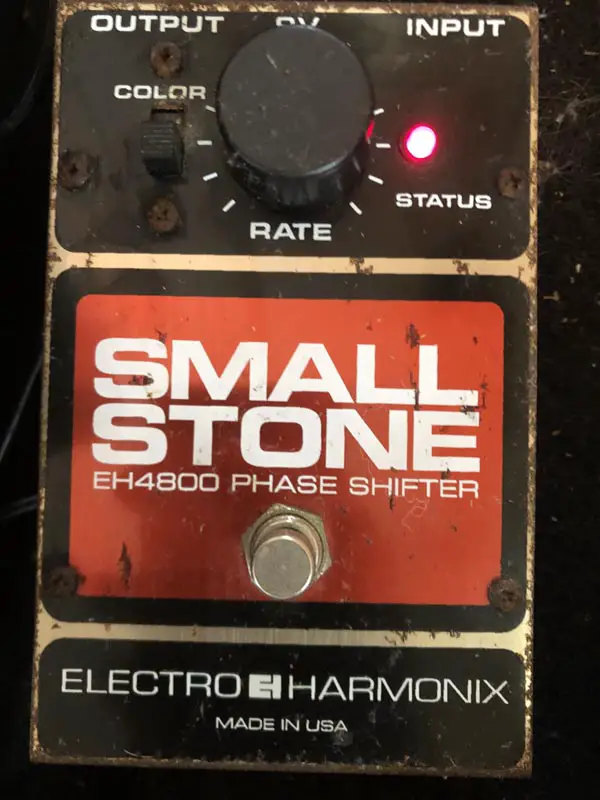
Boosting a phaser with a bit of overdrive makes this effect more pronounced and in combination with a delay pedal can create a beautiful tripped-out sound impossible not to let yourself drift away into.
The original small stone phaser is a great introduction to this type of effect so check it out being played below to see if you need one in your signal chain.
Modifiers – Flanger Pedals
Flangers are famous for their supersonic jet engine sound. They work by layering two identical guitar signals on top of each other.
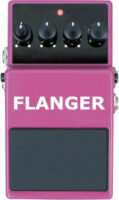
The catch… one of the signals is slowed down giving the impression of hearing the guitar before it’s actually been played.
Depending on the depth you set on the pedal this effect can be over the top and excellent for huge solos that require a bit of extra sustain. When used subtly they create a dreamy meandering tone that isn’t too in your face!
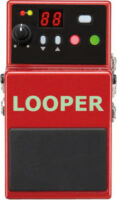
7. Looper Pedals
Loopers do exactly as the name states. They allow you to loop what you played and play something else over the top of it. You can even record another loop on top of a loop to build songs on the spot!
Where to put Looper Pedals
They should appear at the end of your signal chain but before anything that adds ambiance or repeats.
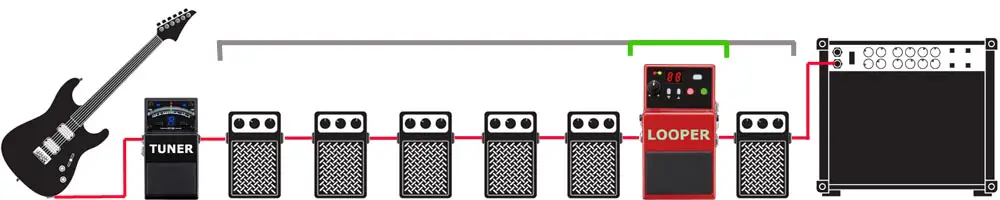
This lets those types of effects sound more natural as they continue to affect the loop instead of looping the delayed or reverb signal which usually ends up sounding messy!
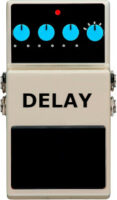
8. Delay Pedals
Delays work by replicating whatever sound comes through them and repeating it over and over and over again!
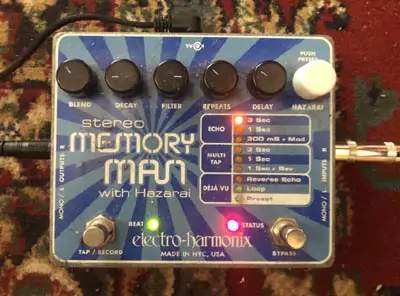
Most come with a footswitch that allows you to tap in the beat of the sound you’re playing so that the delays repeat in time with you’re playing.
A popular and versatile delay is the Electro-Harmonix Memory Man. It offers a bunch of settings that can be tweaked to your heart’s content. Give it a listen below to see if your signal chain needs a delay!
Where to put Delay Pedals
Delays are right near the end of the signal chain so that the entire sound you play gets repeated.
Placing it any further up means the repeats are all individually run through the other effects, this causes your tone to sound muddy!
9. Reverb Pedals
Imagine you’re standing in the middle of a cathedral, now imagine you yell in the middle of that cathedral. The muffled echo you hear is reverb!
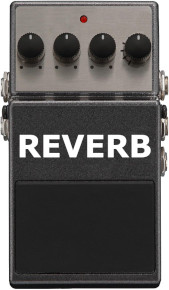
Reverb is a great way to wrap up your tone and make it sound smooth and complete. If used sparingly it can add a kind of musical blanket around how your guitar sounds, something that comes in handy when chaining chaotic pedals together.
Crank it up and you get a distant and melancholic tone that can make your guitar sound as if it’s being played somewhere far away.
In genres such as dream pop reverb is an unavoidable staple that gives the genre much of its ‘dreaminess’.

The Boss RE-20 is modeled after their old-school analog delays and is one of the most popular reverbs you the market! Hear it in action below.
Where to put Reverb Pedals
Reverb should always be at the end of your signal chain as it creates echoing trails after the signal has run through the pedal.

Placing it anywhere earlier will get you a one-way ticket to tone drain oblivion and should be avoided at all costs!
How to Chain your Pedals (The Right Way)
1. What Cables Do I Need?
If you’ve never owned individual pedals before you might not know about patch cables. Patch cables are basically very small guitar leads designed to fit snugly between the pedals on your board or set up.
While the convince of small cables for small distances might seem like the only reason to use them there is a very important reason to make sure you get yourself a nice big supply of them before building your signal chain.
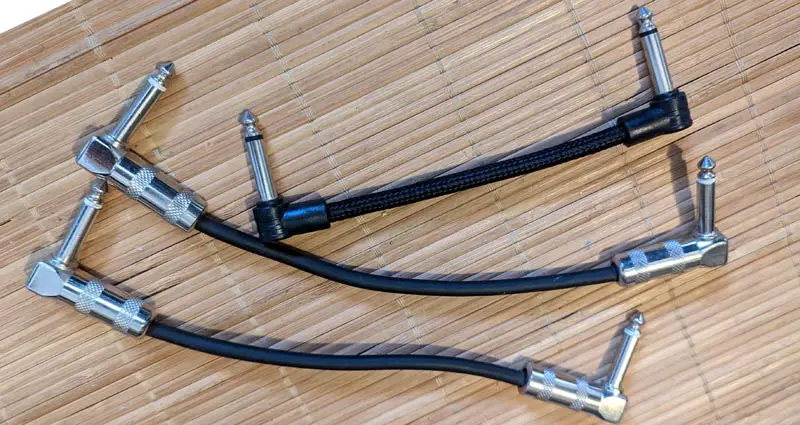
Small cables = less distance your signal has to travel. While that might seem like a silly point to make it’s essential to your tone. As your guitar signal travels through your cables it is constantly losing strength and the bigger your chain the more signal loss you’ll get.
By using patch cables you minimize this technical frustration and your tone will thank you for it!
2. Connecting Your Pedals: The Secret Sauce!
Chaining all your pedals together is a relatively straightforward process, but not one you want to rush into.
Ideally, you want to connect your pedals in the REVERSE of your signal chain order starting from your amp and moving backward through the chain.
The reason for doing this (especially on your first go) is that it gives you the chance to test each pedal as you go along.
Plug your last pedal into your amp via the OUTPUT of the pedal and plug your guitar into the INPUT of the pedal. Give it a little play to make sure the pedal is working alright before moving on to the next.
Continue down the signal chain making sure each pedal is operating normally until you reach the start of the chain.
This will save you the unnecessary headache of setting up your signal chain only to find something has gone terribly wrong and having to pull the whole chain apart.
3. How To: Running Into Your Amp
Creating a signal chain is just the same as plugging your guitar into your amp with more stops in-between right? …Wrong!
There are a few ways you can run your signal chain into your amp and some are better at preserving tone than others.
Plugging directly into the amp’s input from the last pedal on your chain will work but it’s not the cleanest way to do the job. If it’s your only option I wouldn’t stress about it too much and it certainly doesn’t warrant rushing out to buy a brand new amp.
However, if your amp has an effects chain then you’re in for a tonal treat. An effects chain allows you to run your effects independently from your guitar. You can check if your amp has an effects chain by checking the back of the amp. It will be clearly labeled and sometimes offer stereo inputs.
When using an effects chain you get to plug your guitar directly into the amp as your normally would. Your guitar signal is then run through the amps’ in-built pre-amp and then through your signal chain.
This puts less pressure on the pedals and gives you more control over what kind of tone you feed them. This results in an all-around cleaner tone.
2 Ways to Power your Pedals
There are a few ways to power your pedals, the most obvious being to use 9-volt batteries, but doing that is sure to rack up a big bill in replacing them at least once a week if you’re using your pedals a fair bit.
Here are some more convenient ways to power up your signal chain:
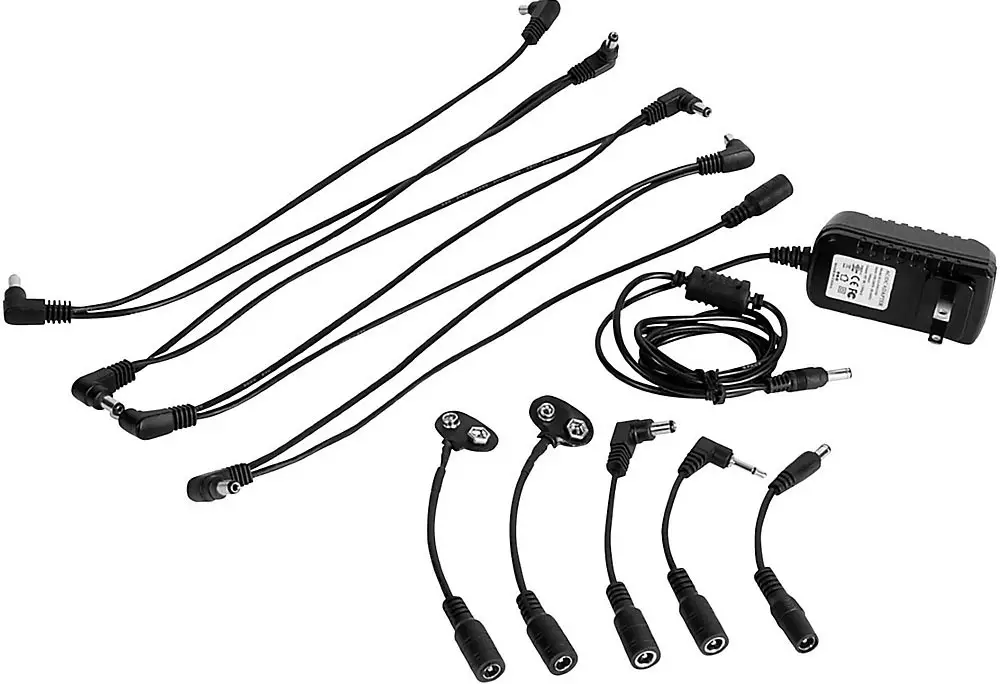
1. Daisy Chaining
Daisy-chaining your pedalboard is a cost-effective way to deliver power to your entire board with a single cable.
Daisy-chaining works by plugging in a single 9-volt power adapter into a wall socket and powering all your pedals together. The cable attached has multiple power outputs one after the other. This lets you lead the cable around your pedals plugging in each of them in order.
On-Stage Ps801 Pedal Power Pack
It’s straight forward and daisy chain cables are inexpensive.
The downside is that it can lead to a lot of unwanted hum in your signal chain. Because the power going into your pedals isn’t isolated electronic interference runs through your pedals and can cause a static-like buzz that will get on your nerves!
2. Pedal Power Brick
The simplest way to get power to your pedals without worrying about any of the pitfalls of daisy chaining is to get yourself a pedal power brick.
These power supplies plug into the wall and offer anywhere from 4 to 24 power outputs to get your pedals juiced up and ready to go.

CIOKS DC7 Pedalboad power supply
And the best bit is that each output delivers isolated power to your pedals so you never need to worry about any interference getting in the way of your perfect tone.
Perfect Guitar Chain Signal Order
So now you understand more about the logic behind building your guitar pedal order you have a great foundation to build on.
There is no single perfect way to build your guitar signal chain, but with some knowledge of how the different types of fx pedals work together and some experimentation you will find the order that works best for you.